Don’t you love it when games you like in real life work beautifully in the classroom? This is one of those games!
I’ve got loads of ways you can use the Heads Up vocabulary game in your class, so let’s jump in!
? What is the Heads Up Vocabulary Game?
Heads Up, the Forehead Game, What’s on my Head?, Word Up, Headbands…it goes by many names, but they all refer to a game using either questions, charades, or clues to get a player to guess the word they have chosen that is displayed on their forehead before time runs out.
If you’ve seen the Ellen DeGeneres show, you may have seen her playing Heads Up! with guests. The app is a version of the game where the player choosing the word holds a phone up and other players give clues to try to help the person guess the displayed word.
If you haven’t seen the app version, you may have seen or played the board game Headbandz, which is an analog version of the same idea.
The other common version of the game is where the person who draws the word asks questions of the other players, as opposed to having clues be offered by them.
For a vocabulary activity, we tweak it a little bit.
Instead of random words, we have students display target vocabulary words and ask questions of their peers (or be given clues) to try to guess the word.
This game is wonderfully adaptable to many content areas and grade levels.
? How to Play Heads Up
There are lots of ways to play and loads of variations, so let’s find out more!
First, let’s look at a basic version of how to play so that we have a feel for the game.
The game can be played in groups or as a whole class, so we’ll look at how to play each of these versions.
The version here is the one where the person drawing the card asks questions. Stay tuned for directions for the version where the other players offer clues!
How to play a basic version: In Groups
- Divide students into groups of three to five.
- Give each group a stack of cards, face down.
- The youngest student goes first and draws a card.
- Without looking at it, the player shows the card to the other members of the group.
- The card is placed on the forehead by being stuck in a headband (see below for options for displaying the card).
- The player who drew the card asks yes or no questions of the other people in the group. No gestures or noise is allowed.
- If the player guesses the word before time runs out, the team gets a point.
- Repeat until the end of the game.
- At the end of the game, the team tallies their cards.
(See “Variations” below for ideas on ending the game.)
How to play a basic version: Whole Class
- To play as an entire class, students each have a word on their heads (see “Cards” below for ideas on this).
- The students do not know what the word is. They walk around the classroom asking each other questions to determine the meaning of their word.
- When they guess their word, they turn their word around or remove it, but they continue to offer clues to other students.
- Play continues until every student has guessed their word.
- If you feel like a student is stuck, the teacher can begin to offer clues or allow the student to pass and exchange words.
? How to Choose Words
My first piece of advice on choosing words is to select words that students know.
This is not a great strategy for introducing vocabulary, but rather for reviewing or reinforcing it.
If your standards have vocabulary, that’s a great place to look.
I’d recommend dividing those words up into sections based on when students will learn the words.
If you give them words they haven’t encountered yet, you’ll have problems because, as I mentioned, it’s not great for initial instruction.
It’s fine to choose words that students struggle with. In fact, those are the most important words to review.
This activity is great for reviewing a large quantity of words, so you may want to use it at the end of a grading period to go over all of the words students should know.
It’s also great for reviewing words they had previously learned that they may not still be working with but should know.
You can use it at the beginning of the year or a single unit to see if students know words you think they know. (See “Preassessment” below for more on that.)
If you want more advice on choosing vocabulary words to teach, I’ve written an entire, super comprehensive article about that.
? Prep Work
This game is not low-prep the first time it’s played, but once that initial prep is done, it will be super fast every other time.
I find that it’s a time investment that’s well worth it.
Materials needed:
A timer:
I use inexpensive 60-second sand timers. This seems to be the best time for a round. I use these timers for lots of things, not just this game, so the investment is worth it to me.
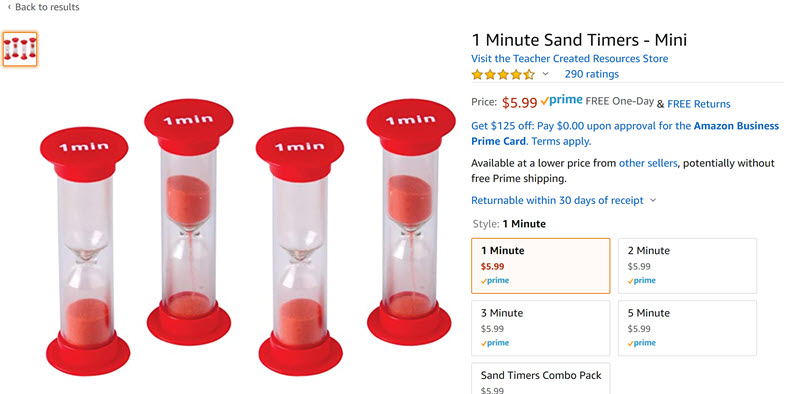
You can get other lengths of time, but this is what I get. (Affiliate link)
You can also use a digital timer. You need one for each group, though, so keep that in mind.
I’ve tried using just one timer and calling “Go!,” for each round, but that doesn’t work well because students aren’t ready at the same time, and it just causes extra stress and chaos.
Those are two things no teacher needs more of!
Cards
Of course, you’re going to need cards with the words on them. There are a number of ways to create these.
Index Cards:
You can simply write the words on old-school index cards (pretty neon colors optional).
This is simple, but time consuming. If a card is lost from the set, it’s gone.
Since you need a deck for each group (unless playing as a class) that’s a lot of cards. Because of that, this is not my recommended method.
Post-it Notes:
Post-it notes work really well because you can print on them (rather than writing the words out), and they already have adhesive on them, so students can stick them right to their forehead.
Because they are inexpensive in the (ugly) yellow color, it’s okay if they get ruined.
Personally, I’m a Post-it snob and like the bright colors, but if you have access to the (sigh) yellow ones, go for it.
I use these so often and for so many things that I wrote an entire article, created a template for you, and made a video tutorial about how you can print directly on Post-its.
It’s one of my fave teacher hacks.
Read the article or watch the video.
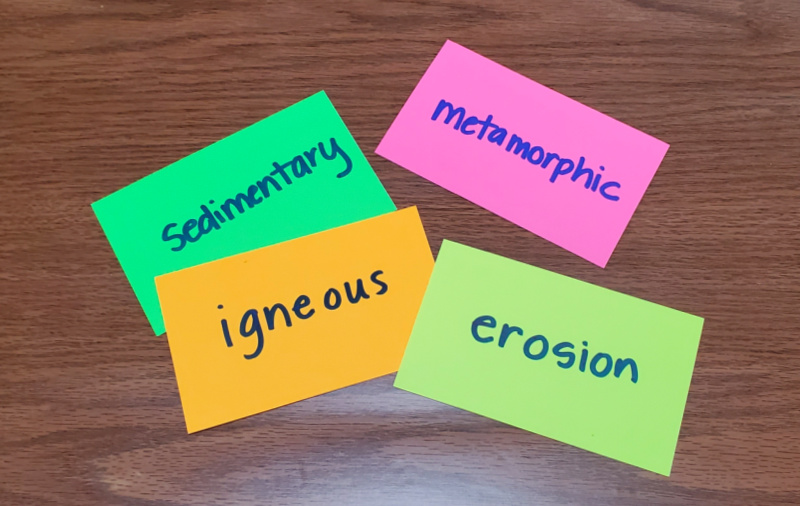
DIY Cards:
I use this method frequently. I type the words out and print them on cardstock. I cut the cards out and laminate them.
I laminate them because I will use them in other activities and games as well.
Did you know cardstock comes in different weights? It does! It ranges from 60# to 130#. The higher the number, the heavier and stiffer the cardstock.
If you are going to laminate the cards, it doesn’t really matter, but if you’re not, it’s worth getting heavier weight cardstock to make it more durable.
The 100# weight will feel much more sturdy than the common 65#.
If you are using index cards, sticky notes, or the DIY method, make multiple sets so you have enough for every group.
Digital:
You can also type the words in Google Slides or in a PowerPoint, one word per slide.
If you have the Google Slides or PowerPoint apps, students can use these on a phone. If not, they can use a tablet or iPad.
A way to hold the cards (optional):
Holding:
Students can hold the cards in their hands, but if the guessing takes awhile, this can get tedious.
Headbands:
I suggest using cheap headbands from the dollar store. You can order online and have an entire class set sent to a store near you. I just wash them.
I’ve seen people suggest rubber bands, but I don’t recommend that for what I hope are obvious reasons!
Headband Word Hats:
For younger students, this is one of my favorite methods, although my 10th-graders love it, too.
Using my template, I type in the words, duplicating the slides to make as many as I need. (You can make a copy of this template for your own Google drive free here.)
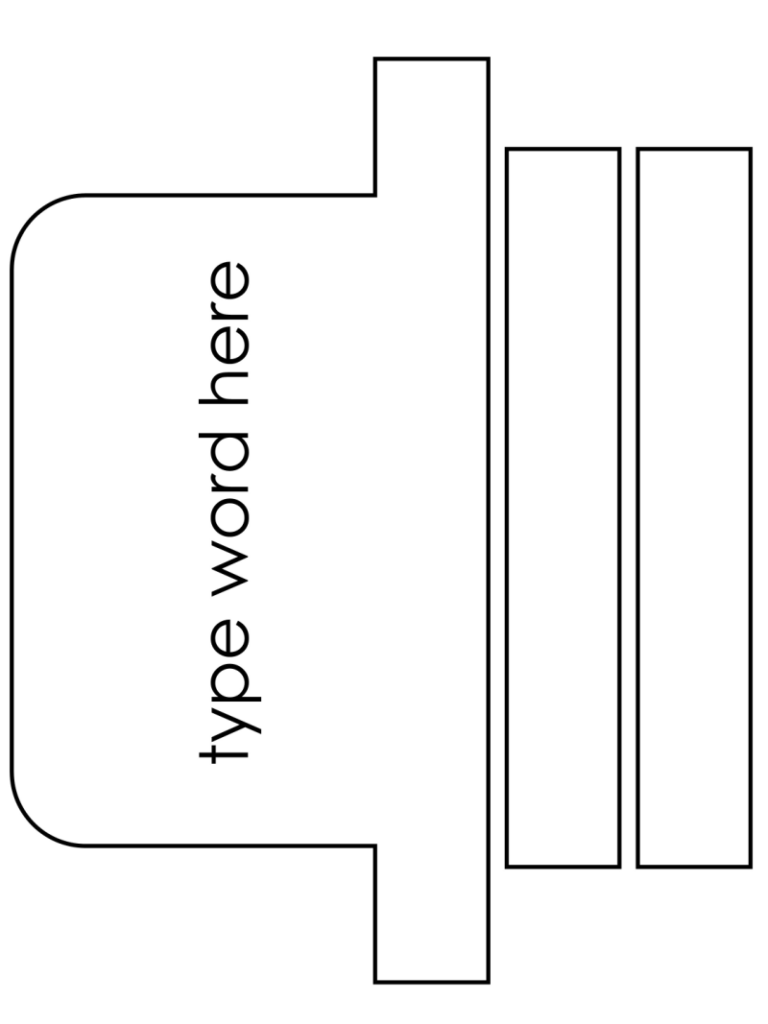
I print out the headband hats on different colored paper or cardstock, and I have students cut them out and staple the pieces together.
Staple the pieces together where they overlap in the back of the students’ heads and cut off the excess paper.
If you want these to be useable over and over, attach a paper clip to the headband above the student’s forehead and stick the clue card in the paperclip.
Use cardstock if you do this.
Have students write their names on the inside of the headband so that they can be reused.
I find that it doesn’t hurt them beyond usefulness to be folded flat.
? Student Directions:
Here’s how I explain the game to students. I’m giving two versions, but you should adjust these to match the variation you have decided to use.
Student Directions for the Clues Version:
This is the version where the student holding the card is given clues by the other players.
Directions for students:
- Shuffle the cards.
- The person who choose the card is called the “Guesser.” Other players are the “Cluers.”
- The Guesser draws a card from the deck without looking at it and places it on their forehead, with the word facing the Cluers.
- The Guesser flips over the timer, and it’s game on!
- The Cluers start giving clues to help the Guesser figure out what the word is.
Cluers Can:
-
- Draw a picture
- Act out the word
- Give an example
- Cluers cannot give the word or any part of the word.
- If a Cluer says the word or any part of it, the card is passed.
- If the Guesser is able to figure out the word, they put the card down and pick up another card.
- The Guesser may pass on the card by putting it in a separate pile and drawing a new card.
- When time is up, the player to the left of the Guesser becomes the new Guesser.
- At the end of the game, the whole group counts up how many words were guessed. Subtract the number of cards that were passed. That’s the team’s total points!
If you play this version, it’s important to make sure that the class understands that if the player isn’t guessing the word, it may be that the clues are not sufficient.
Student directions for the question version
This is the version where the student holding the card asks questions of other players.
Directions for students:
- Shuffle the cards.
- The person who choose the card is called the “Asker.” Other players are the “Answerers.”
- The Asker draws a card from the deck without looking at it and places it on their forehead, with the word facing the Answerers.
- The Asker flips over the timer, and it’s game on!
- The Asker asks questions that can be answered with a “yes” or a “no.”
- Answerers can only answer “yes” or “no.”
- Answerers cannot give the word or any part of the word or act it out or give hints of any kind.
- If a Answerer says the word or any part of it, the card is passed.
- If the Asker is able to figure out the word, they put the card down and pick up another card.
- The Asker may pass on the card by putting it in a separate pile and drawing a new card.
- When time is up, the player to the left of the Asker becomes the new Asker.
- At the end of the game, the whole group counts up how many words were guessed. Subtract the number of cards that were passed. That’s the team’s total points!
? How to play with the Heads Up app
If you would like to be super techy fun, you can modify the Heads Up app to play with your academic vocabulary.

You will need the paid version of the app to do this (it’s currently $1.39) because you need the custom deck feature available in the paid version only. Additionally, you need to spend 99 cents to buy the customizable deck.
This version does not work well as a whole group, but does work well for an intervention strategy or a learning station or a guided group activity.
After you buy the deck, select Create Your Own Deck and type in the words you want students to practice. You can add words to your deck whenever you want, so don’t stress about this part.
The game comes with a built-in video with the instructions, and it’s super easy to play.
A player holds the device (phone or iPad) up to his/her forehead. (Warning: iPads or other tablets get heavy!!!)
A vocabulary word will pop up on the screen.
The other players give clues to help the player guess the word without saying the word or a part of it.
When the word is guessed correctly and the player wants another word, the player bows his/her head forward, tilting the phone, and a new word will pop up on the screen.
If players believe the word isn’t going to be guessed, they can tilt their heads backwards (so the phone tilts). A different word will appear.
Each player’s turn lasts 60 seconds, with players then counting how many words they were able to guess in that time.
The device is passed to the next player, and the game continues until every player has had a turn or the allotted time has passed.
Note: It’s a good idea to have students wipe the device between players with an antiseptic wipe.
I’m not recommending this method, necessarily. I don’t think it really saves much time overall, and every device needs the paid version.
? When to Use the Heads Up Game:
One reason I’m devoting thousands of words to sharing the details of this activity is that it is so versatile. It belongs in every teacher’s toolbox.
Used in a whole-class method, this game is perfect for stolen moments.
It can be played in just a few minutes and works even while waiting in a line while kids take turns using the restroom or at similar times.
Played in small groups, it works in guided groups or in learning stations or centers.
It’s a perfect activity for re-teaching, and can be included as an intervention strategy for a student requiring additional practice.
It’s an easy game to share with parents for practice at home, if needed, wanted, and necessary.
? Why I Like It
If you play with questions or verbal clues, as opposed to charades, the thinking is usually deeper.
It develops different neural pathways to the same term, which is how we build deeper knowledge.
It’s flexible, easy to play, and students like it.
It allows us to work with small numbers of words, so it’s one of the few activities that works when there are only a few words one needs to review.
For example, if you have students in groups of three, you only need three terms for each person to have a turn.
Other benefits include:
- Students enjoy the learning
- It’s a great content-based ice breaker
- You can use it to build rapport in groups
- It encourages risk-taking
? Variations
You can easily make subtle variations, such as using Rock/Paper/Scissors to decide who goes first instead of the youngest player.
Other variations add more depth or change the experience more significantly.
For instance, you can vary the way you end the game. You can play until:
- a set time runs out
- the first team to reach a certain number of points wins
- an individual player gets a certain number of cards
- every card has been played
You can play with large decks or small numbers of cards.
Rather than each player trying to guess a single word in their turn, have the player try to get as many words as possible in the time allotted. Or, if you’ve been playing this way, play without a timer and just play until each word has been guessed.
Play in pairs and have them work as a pair to get as many words as possible as a duo in the time.
Give different words different point values.
? Distance Learning Version:
It’s a little trickier to play this game in a distance learning environment. You can message all of the students except one with the word, and have that one student be the Guesser. This is a little difficult, though.
You can divide the students into groups or rooms, and have one student in each room be the sharer of the words. That student messages a word to the others except one, who will be the guesser.
You can play a reverse version where the teacher knows the word and all of the students are guessing. This is perhaps the easiest way of all.
? Differentiation
To offer a greater challenge to strong students, you can make a challenge deck of difficult words.
For students needing support, offer question cards with possible questions the Guesser can ask about the word, such as:
- Am I alive?
- Am I a place?
- Am I an animal?
- Am I a person?
- Do I move?
- Do I make noise?
- Can I swim?
- Can I fly?
- Do I get eaten?
- Do I belong in a house?
- Can you buy me in a store?
- Am I bigger than a gallon of milk?
- Am I heavier than a baseball? A box of books?
- Can you hold me in your hand?
Some students have trouble thinking of questions, so this can be helpful.
If you are using vocabulary specific to a discipline, your questions should reflect that.
For math, the questions may look like:
- Am I a number?
- Am I an integer?
- Am I a theorem, rule, or law?
- Am I related to lines?
- Am I related to shapes?
- Am I related to triangles?
- Am I related to variables?
- Am I related to circles?
- Am I represented by a symbol?
- Would a fourth-grader know me?
- Would a seventh-grader know me?
- Can I be measured?
- Do you use a protractor with me?
For ELA, the questions may look like:
- Am I a literary element?
- Am I related to conflict?
- Am I related to characterization?
- Am I related to plot?
- Am I related to poetry?
You can also give a definition on the card for the person giving the clue as a support for struggling students.
? Preassessment
Heads Up works great for preassessment of vocabulary you think students should know prior to a year or unit.
There are two strong methods for preassessing using this method.
Both of them start with the same premise: The teacher compiles a list of vocabulary words the students should know or need to know prior to a learning experience.
That learning experience may be a particular unit or lesson, or it may be an entire year.
It’s amazing to many teachers how often students will have huge deficits in common academic vocabulary!
“Huh, you don’t know the word ‘angle.’ That’s going to make teaching measuring the area of a triangle tricky.”
When we know what words students don’t know, we can target those words with those students. To do this, we preassess.
Preassessment Method #1: Pairs
Play the Guesser/Cluer version of the game for this.
- Have students play the game in pairs using one deck per student (so the students will each play the entire deck).
- Have the Guessers guess their entire decks (not taking turns), and then switch.
- Have the Guessers set aside every word that is passed.
- Once they have played, have them switch and play with a different partner, using only the words that were passed.
The reason for this is to make sure the student didn’t miss the word just because of a poor clue-giver.
Whatever words are passed in this round are the target words that students need more review on.
Each student will have a different list.
Review those words in whatever method you want. If you find that the same words are commonly unknown, you may wish to do a whole-class review.
If you have some students who may be weaker, consider having a small group work with you as the Cluer for them.
Preassessment Method #2: Whole-class Review
For this method, the teacher goes through the whole deck being the Cluer.
Students have a sheet with a numbered list where they write down the word they think it is.
To play this, use larger paper (full sheets) with the words. Stack that face-down.
Have students take turns coming up and drawing a sheet and holding it against their foreheads.
Take care that the rest of the class cannot see it, only the teacher. You can have them sit in a chair facing the teacher while the teacher is standing.
The teacher gives clues, and the students write down their guess. When the teacher has given what he/she feels to be sufficient clues, the student holding the card shows it to the class.
Students put a check mark if they got it correct, and circle the number if they got it incorrect. All students write the word on their sheet.
The student holding the card gets credit for the word when they return to their seat. Trust me, they’ll remember it.
Another student comes up and draws a card.
Game repeats until all words are done.
This is a student fave!
? Wrapping Up
I’d suggest playing a few whole-class rounds with the teacher being the one holding the card. That way, students who aren’t familiar with the game can learn it without stress.
Also, students who may have played a little differently from the way you’re playing will pick up on this version.
This is such a great game, and once your students have played it, you’ll use it again and again.
There are few activities as flexible of this, and it works well for teachers with a variety of personal styles.
Because the clues and questions will vary based on the students playing and are influenced by group dynamics, it feels fresh, even when played frequently.
If you were only going to pick a handful of vocabulary activities, this is one I’d definitely include.?
? You May Also Like:
- Teaching Vocabulary with Depth and Complexity Frames
- Where to Find Great Vocabulary Activities
- Playing with Concept Cubes to Teach Vocabulary
If you haven’t joined the luau yet, I hope you’ll sign up! You’re always welcome at the luau – where I’ll keep you in-the-loop of all things vocabulary! You’ll get the freebies, even if you miss the articles, and you’ll get luau-insider tips & ideas. Join in here.